
Restaurant Partner Photography Guide
Create bite-worthy photos that get approved every time
Did you know… customers are much more likely to buy from your business if they can see pictures of your dishes or items first?
Menu items with photos are four times more likely to be added to basket.
Once a menu item has a photo, it will receive an average of 16% more orders.
Research shows that 42% of customers tried a new dish because of the photo.
The photos you take need to be uploaded and then approved by Menulog to make sure that your business looks as good as can be. Follow these easy steps to get your photos approved – and attract as many customers as possible. Got photos ready to go? Upload them below.
Taking your own photos
When taking photos, keep this photo checklist to hand. It'll help you upload photos that get approved every time:
- Make the food look as good as it tastes!
- Dishes should be cooked/prepared as you would serve them, looking as fresh and presentable as possible (either in takeaway containers or on plates).
- Make sure the dish/item is in the centre of the frame.
- Take the picture in natural daylight or a well-lit room and use a clear, consistent background across all of your photos.
- Don’t include people or hands, or add any text over the image.
- Don’t overcrowd the image – keep it simple.
-
Take photos in landscape
If using your phone, turn it on its side (long edge on the top and bottom). If you’re using a digital camera, hold it normally (do not turn it on its side).
-
Aspect ratio - get the size right
‘Aspect ratio’ may sound technical, but it just explains the size and shape of your photo. Dish/item photos and headers photos need to be a certain shape, so that they look their best across our web and mobile apps. But don’t worry, most phones can help you get the size right.
You’ll need to take two types of photos, in different sizes
Header photos
These appear right at the top of your business’s menu/product list. Just one is needed!

3:2 is the aspect ratio for header photos. Just like dish/item photos, they should be rectangular with a longer width than height. 3:2 is quite tricky for most phones to manage, so we suggest setting an aspect ratio of 16:9 and - when you're ready to send in your photos - using our guide within the Uploader Tool (below) to crop it to fit.
To get 16:9 on your iPhone: Open your Camera, click on the small arrow icon, then choose 16:9 from the options given.
To get 16:9 on your Android: use the process outlined in the 4:3 dish/item photo guide, then choose 16:9.
NOTE: You can get a 3:2 ratio after you have taken a photo on an iPhone: Select Edit > Crop Tool > Aspect Ratio Tool, then switch it to 3:2.
Check the pixel dimensions: the minimum we accept is 2130x1430px, but the bigger you can send it in, the better.
Dish/item photos
These are photos of an individual dish or item from your menu/product list. Upload as many of these as you need.
4:3 is the aspect ratio for individual dish photos. Luckily, 4:3 is the standard setting on iPhone and is also easily found on most Android phones.
For most Samsung phones, open the camera and touch the screen, then go to Settings and choose an aspect ratio of 4:3.
For most Google phones, open the camera and touch the screen, then choose an aspect ratio of 4:3.
Check the pixel dimensions: the minimum we can accept is 1024 x 768px, but the bigger you can send it in, the better.
Do... consider the overall look. Arrange a selection of freshly prepared dishes which best represent your business.
Don’t…set up messy, over crowded looking photos with poor lighting. These will be automatically rejected.
Step 1
Put three or more of your most popular dishes or items together on a clean table or counter.
Step 2
Position your digital camera or phone correctly. If using a phone, hold it in landscape (long edge on the top and bottom).
Step 3
Hold your digital camera or phone directly above the dishes or items. It should be high enough to include most of the dishes, but not so high that lots of tabletop or background is captured.
Step 4
Lightly press the button on your camera for a few seconds so the camera focuses on the food. Then click. If you are using a smartphone, lightly press on the screen where the food is, so the camera focuses on the food. Then click.
Please see 'Saving and uploading your photos' for information on recommended file sizes, names and dimensions for your photos.
Do… prepare dishes from your menu only. Set them up in good lighting, with a clear and neutral background.
Don’t …zoom in too much, add in extra items or use plates which are too big.
Step 1
Prepare a variety of your most popular dishes and gather any items which don’t require cooking. Include a selection of starters, sides, mains, desserts, and drinks.
Prepare according to what is listed for each dish. For example, if the menu item is a portion of 3 spring rolls, you should prepare only 3 spring rolls. If a dish comes with a side, such as a sauce, salad or chips included, make sure you also get that ready to be photographed. Do not include extra items in the photos, such as chips or rice, if they are sold as separate items on your Menulog menu.
Different size options? Prepare the smallest size only.
Dish varieties? Prepare one only. For example, if you make a curry with chicken, tofu, or vegetables, you only need to prepare one.
Step 2
Use the dish guide below to take each photo at the correct angle. Firstly, if using a phone, please hold it in landscape (long edge on the top and bottom).
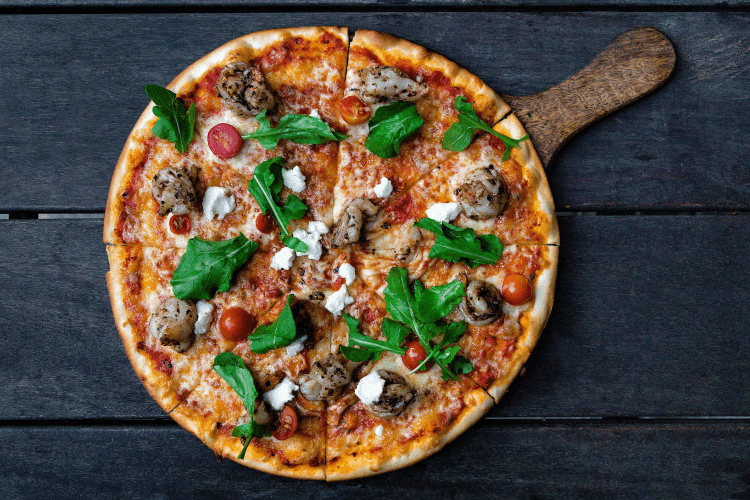
Flat food, such as pizza
Take the photo directly above the dish (at a 90º angle to the dish).
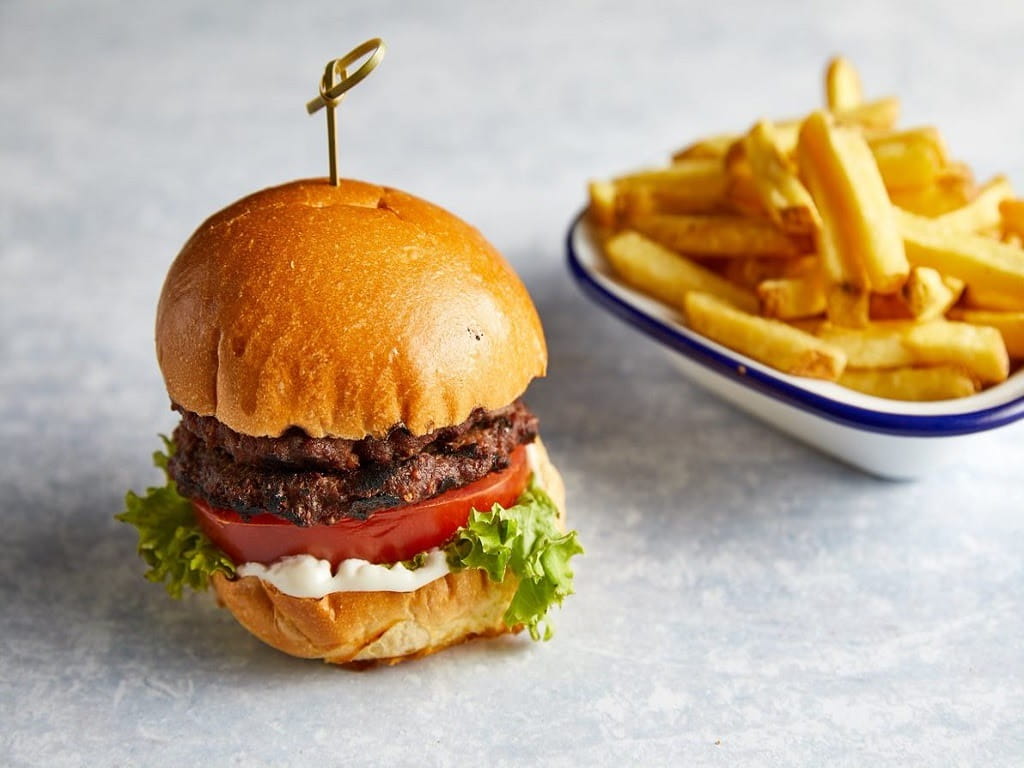
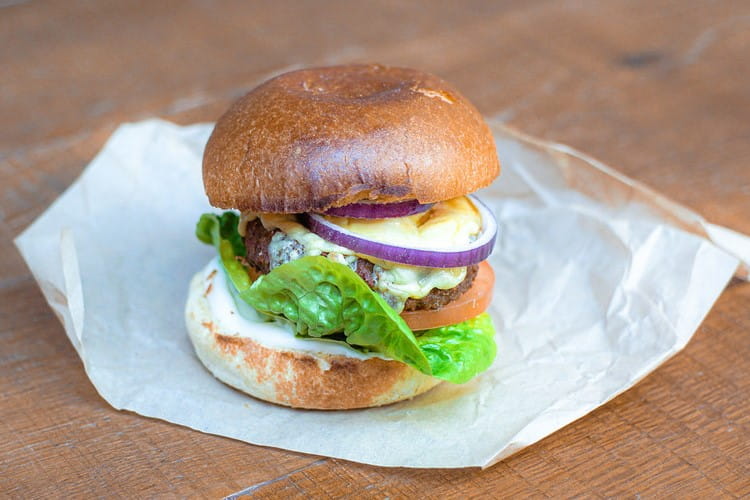
Drinks and layered food such as burgers
Take the photo straight on, on a level with the dish (at a 0º angle).
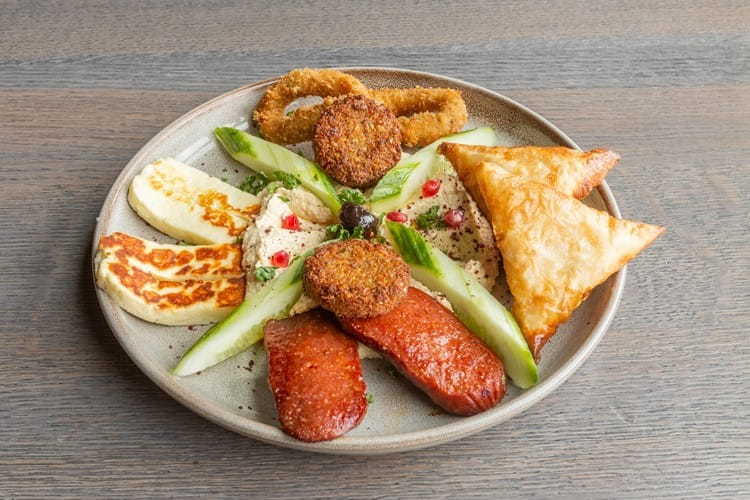
All other dishes/items
Take your photos somewhere in between ‘directly above’ and ‘on a level’ (at a 45-degree angle to the dish).
Step 3
If you’re using a digital camera: Have your camera a few inches away from the dish and use your camera’s macro mode (usually shown by a flower icon). On the screen you should be able to see the dish and some space around it. When you are ready to take your photo, lightly press down the button on your camera for a few seconds so the camera focuses on the food. Then click.
If you are using a smartphone: Lightly press on the screen where the food is, so the camera focuses on the food. Then click.
Step 4
If your photo is too dark, try taking it again with a flash. If it is too blurry, try taking it again, making sure to stay still.
Step 5
Please see 'Saving and uploading your photos' for information on recommended file sizes, names and dimensions for your photos.
Saving and uploading your photos
-
Whether you’re taking header or dish/item photos, your image size should be no less than 1MB and no more than 10MB. Save the files as either .png or .jpg format.
-
When naming the image, use the name of the item or product, exactly as it appears on the menu/product with no spaces or special characters, for example: ChickenNuggetsAndChips. This will help us to match the photo to your menu/product list.
-
You can upload one menu header photo using our Photo Uploader tool (scroll down to use it). Please use Partner Hub to upload photos to your Menu/item list to show customers your items and help them choose.
-
When you have uploaded your photos, Just Eat will check the photos and arrange for them to be added to your menu.
-
If your photos have passed our quality checks, they will appear on your menu in 3-5 working days.
-
If any of your photos get rejected, you will receive an email letting you know. You can then retake and re-upload these new photos.
Dish Photos
Please use Partner Hub to upload photos to your Menu/item list to show customers your items and help them choose.